You know I’m crazy about spring and I want to celebrate it
with colorful clothes, proper beauty products and, of course, new manicure that
reminds me of spring.
So I decided to make some
gel nails decorated with water decals technique.
Those are the things I used for my nails:
-nail polish remover with a cotton pad
-nail file and buffer
-cuticle remover (that metal stick)
-nail wipes
-nail primer and bonder
-clear tips, nail glue, nail trimmer, construction gel and a
flat brush
-nude nail polish
-a cup with water (at room temperature), scissor, tweezers
and a paper napkin
-top coat
-cuticle oil
Let’s get started! ;)
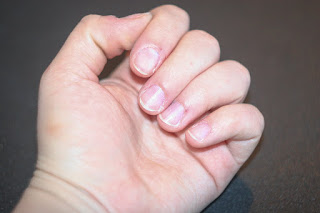
You can see my nails are pretty dull, short and painted with
purple nail polish...just boring!
I started by removing the nail polish.
Then I gently pushed back my cuticles and I cut them
using a regular nail scissor.
I know many won’t agree with cutting the cuticles,
but this is how I like to do it (and I can tell you I don’t harm my nails by
any means).
Next I filed my nails (taking care of the edges!) and I used buffer
gently for my nail surface. After I filed all my nails , I took a nail wipe and I cleaned off the nail dust.
Now I was prepared to select and glue on the tips.
I’ve started by selecting
the tips that matched with my fingernails size and then I glued them on to my
nails.
When I had all the tips on I looked like a crazy cat! :D
Now for the part I hated the most! It was time to cut and file the tips. Such a boring work...and was a lot of work.
Now for the part I hated the most! It was time to cut and file the tips. Such a boring work...and was a lot of work.
Fun fact: this is how much I had cutted of the tips
I also filed the surface of the tips until I couldn’t felt
the transition between my natural nails and the tips.
I wiped the dust
again, I applied the primer (not touching my cuticles) and then the bonder.
BE CAREFULL TO NOT TOUCH YOUR CUTTICLES WITH PRIMER! If you
have any skin lesions and you put primer on it will burn like hell for a couple
of seconds!
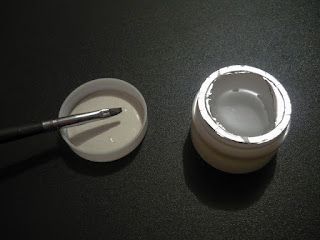
Now for the fun part: applying the gel.
I used three layers:
the first one only on my natural nail surface and with the other two I created a bridge between my
nail and the tip.
I cured every layer for two minutes using my UV lamp.
After
all my fingernails were covered in gel I wiped off the sticky layer (and I
looked over to see if there were any gel bumps to file off-luckily there weren’t
) and I painted every nail with two layers of nude polish.
Finally, the water decal technique!
I cut the foil with nail
designs one by one (trying to match my nail size with the foil) and then I put
the foils (one at the time) into the water and waited for about 20 sec (I
counted :P).
Then I took the foil, wipe out the exces water using a paper
napkin, gently pull off the design with my fingers and place it on the selected
nail and I added my favorite top coat
on!
With an orange stick I cleaned my nails (and under my nails) off the exes
foil.
For the final touch I put some oil onto my cuticles and that was all!
Before and after
I’ve worked like three hours at my nails but I think it’s
worth it! Now I have the perfect nails for this spring!


No comments:
Post a Comment